I'm absolutely in love with this look right now. If I could stripe or chevron everything in my house, I'd probably do it. Cue Elvis' Jailhouse Rock. The simple gray stripes are clean, modern and add a perfect accent to the room. Originally, I couldn't decide between stripes or chevron. To be honest, I decided on stripes because it would be 100 times easier. I took the lazy way this time :). Seeing them hung now, I couldn't imagine them any different.
So to share my excitement, here's a little tutorial. There are a lot of pictures I didn't find so bare with me. I do have a few, but I'll try to be thorough enough to make this way easy for ya.
Items you'll need:
White Curtains
I bought 2 sets of white curtains from Target. Not too expensive, but if you even wanted something cheaper, check out the clearance sections in different stores and even pick a few sets up from Walmart. No need to splurge here.
White Curtains
I bought 2 sets of white curtains from Target. Not too expensive, but if you even wanted something cheaper, check out the clearance sections in different stores and even pick a few sets up from Walmart. No need to splurge here.
Paint
Pick the paint color you want. I actually used several bottles of gray acrylic paint that I had leftover from something else that I decided to use. I picked these up from Walmart in the craft section.
Tools
Paint roller, painters tape and a ruler. I definitely suggest getting a little paint roller for this project. It will roll on much more smooth and leave an even look.
First
I measured the entire length of the curtain and decided about how thick I wanted my stripes. That will determine the amount of stripes I'll have. My curtain length is 84" and divided by 7" for each stripe makes 12 total stripes.
Second
Using my ruler, I marked every 7 inches down the curtain sides. I also did this down the middle of the curtain so that when I laid my tape it would be a straight line going across, no guessing.
Third
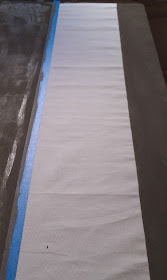
Laid my tape out to mark each section I would be painting. WATCH THIS STEP! Line after line, after line, after line, you'll easily lay it on the wrong side if you're not paying attention. Better to catch it before the paint goes down :)
Fourth
Now for the scary part and point of no return! Rolling on the paint. I only did one coat on mine. I would recommend two coats if you'd like to take the time to. You can see a few areas on mine where the paint isn't as thick and the light kind of shines through. However, that's all up to how you want them to look.
Also, pull the tape off slow.
Now just hang them up. You'll love them, I swear. It will probably be no time before you start looking for something else to take your paint brush to. Good luck!
Linked up to
I Heart Nap Time, Flamingo Toes, DIY Showoff, Under the table & dreaming, My Little Birds


4 comments:
This is such a good idea! I want to make some!
Hey! These are great! I have always wanted to try painting fabric, so you may have just convinced me to give it a go! You have a lovely home! Thanks for visiting and commenting on my blog. I am following you now as well :) And we were both each other's 64th follower. Crazy huh? Have a great day!
This turned out so excellent. I was just telling a friend about this technique, so it was timely I ran across this post! Thanks for sharing.
Amy @ http://www.delineateyourdwelling.com
At this point understand in addition to reveal this arrange VETERAN�S DAY TIME. https://imgur.com/a/FsuaPxG https://imgur.com/a/efQ8qIP https://imgur.com/a/sFvkX9H http://egifzb8pt8.dip.jp http://3a1l20ykph.dip.jp https://imgur.com/a/59EErS1 https://imgur.com/a/9yz5vR5
Post a Comment