Showing posts with label beforeandafter. Show all posts

Saturday, February 15, 2014

For the Love of Baskets

There's a rule in this house. You can never have too many baskets. Nope. Absolutely not. There's always a need for them, especially with a 2 year old running around and 50,000 toys. 50,000 toys that, of course, have to be organized by type, color and purpose because I might be a little OCD... only a little... no way I'll be able to sleep knowing that Batman is sitting in the same bin as the tools.

Surely, I'm not the only multi-tasking mom that has a disaster of a medicine cabinet. If your's is immaculate, I applaud you, I really do; but lets just pretend, it makes me feel a little better. :) I've noticed, this is one of the worst places in our house to get messy so quickly. Mainly because when I'm rummaging for migraine medicine, putting anything back in the right spot is the very last thing I care about. Then something falls and there's a cascade of pill bottles everywhere... that's usually the sign of defeat for the day. 

Finally, I had enough and cleared all this junk out.


Ridiculous isn't it? Any of my OCDers cringing inside?

So what on earth could I use? I turned to my "storage closet" as I call it, probably more accurately called a "junk closet". I found two small canvas baskets I had gotten from Wal-mart a few years ago. So I went through and trashed the expired stuff we obviously wouldn't be using and sorted through it all. I finally got it cleared out and minimized to this.


Any reason to pull out the label maker! Here's a side by side.


This little purge sent me onto another purge, the pantry. It was originally 100x worse, shew! I'll fill you in on that one shortly as well. A little teaser for my fellow organizing freaks... it involves Target and canvas totes :)

Saturday, February 1, 2014

Shoe Molding... makes a WORLD of difference

We've lived in this house for almost 4 years now. So you'd think that all the little imperfections that need to be fixed would be done by now, right? So not true, especially when you have a child, are a working student and a continuing to do list. But, I finally crossed another project off the list which really has its one reward. Killed a few birds with one stone on this one. Score!

On occasion, I do make small lists and may add a few items I've already done so I can feel a little more accomplished. :) This is my trick at least, feel free to use it.

I've been on a grout cleaning spree the past few weekends and the lack of shoe molding around the stairs became even more evident... and irritating. It became the big elephant in the room so I HAD to get this done.

Here's how awful it looked before... plus the paint marks from painting when we moved in... horrific


A trip to Home Depot for some quarter round and matching floor stain we were ready to go. Getting the stain to match up perfectly was the hard part since we didn't do the hardwood ourselves. A little trial and error with colors and we finally found the right one, Provincial 211 by Minwax.


I took the measurements and cut out the molding with my Dremel Multi-Max.


Here would be the first attempt with walnut... I just have to laugh at this :) Why did I even think this would be close?


After this step took a plunge for the worst, I decided I would actually paint it white to match the door molding anyway. I think it turned out looking better than the correct stained color would be.


Then, the floor section is where I stained to match the stairwell. While I was down there, there was no way I couldn't do something about those paint marks so I took a magic eraser and a razor blade to those puppies and they were off!

Here's how it finally looks...


Finally! That awful gap between my tile and stairs is hidden! Seamless and no longer catching every piece of dust my 2 year old flutters up while playing.

Now, just to tackle touching up the paint on the side of the stairs

Sunday, December 15, 2013

Removing water marks

First let me say, I PROMISE YOU THIS WORKS! I think we've all come across those white water marks on our furniture that makes us wonder how on earth they got there! Then a little twinge of devastation runs through you that your furniture is now ruined. At least it did for me...

This coffee table has been one of my best craigslist steals to date. Large cedar coffee table with a raised top for storage in perfect condition for $40.00. It's best feature is its ability to hide ANYTHING you could want in the rush of company coming over. We all do it, I'll just go ahead and admit it for all of us. That pile of paperwork you have lying out, unopened bills, random little toys you've taken up out of pockets and stuff I somehow have never seen before. I think this phenomenon is somehow related to our socks missing after they enter the dryer. My favorite though, loose jewelry and by the end of the month I feel like mommy brain has one another battle.

My point? I depend on this table WAY too much to let it go so I searched for a fix... and found one! A hairdryer. Yes, so go pull it out right now and knock this out! You'll feel 10x better.

Here is my table before with the awful white water marks all over it!


Take your hairdryer, place it pretty close to the mark and hold it there until the mark is gone. It really shouldn't take too long. I swear, the whole table only took me about 15 minutes.


Here is the after! You can't even tell.


Spot #1


Spot #2


You've can't even see them anymore!! I was speechless. I told the husband to come in and look, to show off my newest trick I swore I had and see the amazed look on his face that was on mine, you know. He looked at me, like I was crazy and was oblivious to the fact that it even had water marks on it. He's crazy, they were like an elephant in the room and now those babies are gone. 

Compare the before and after


Sunday, September 8, 2013

Nursery Bedrooom Makeover


This post is well over do considering our little one is now a whopping 22 months! Everyone said it would go by so quickly but OH MY GOD! I ask him everyday to quit growing, but I don't think he's in agreement with me. Now after 22 months, I've gotten the itch to redo his room soon... into a "Big Boy" room.

My goal: hold off on a "big boy" room and bed until he's actually climbing out of the crib. So far we're good - knock on wood! Fingers are crossed that it doesn't dawn on him to just hike his leg up a little higher and go for it.

As far as this room, we did quite a few projects...

1. Replaced ceiling fan
2. Had the tree mural done on the wall
3. Made the animal canvas prints
4. Fabric bird appliques for the tree
5. Paper mache letter
6. Chalkboard labeled baskets


Bedroom BEFORE:

Linked up to

Tuesday, July 31, 2012

Playroom Storage, Pottery Barn Knockoff


If Pottery Barn were a person, we would totally be best friends.

I fell in love with the huge wall storage systems they have on their PB Kids site. The set ups they had were perfect for our bonus room/den where we would make Lucas' play area. The only problem, what I wanted would cost $1300 through Pottery Barn, not including the shipping. Whoa, hold the phone! No way was I going to be able to slide that one by the hubby. I could see it then, that look 'woman, you have got to be crazy' and then saying our then newborn did not need a $1300 storage system for his 5 toys that he had. :) Yes, he was right, but oh men; can't live with them and can't live without him... but someone's got to open the jar lids for me :).

So of course, I was bound and determined to get what I wanted at a much cheaper DIY price even if I had to cut down the tree myself and make it... ok, maybe not that far :). I researched for several months looking at drawers, organizers, cubbies from practically every store measuring out drawings in every kind of configuration I could think of. Nothing was working how I wanted it and my little storage system dream was slowly circling the drain. Finally, the heavens parted and I came across the PERFECT pieces. I found the EXACT parts I wanted, EXACT color with the EXACT measurements to fit each other. I seriously felt like I had won the lottery, felt too good to be true, but it all worked and measured perfectly.

Here are the parts used...

- Drawers are Babyletto and were purchased from Amazon at $100 each
- 16 Cubby System was purchased from Bargain Outfitters for $100


So for $300 instead of $1300, I got the wall storage system I'd been wanting. Hubby gladly put it all together for me and I was one happy wife. It looks great and fills the 10 feet high wall perfectly. Now the real trick, keeping it organized :).

This is the playroom BEFORE...


Playroom AFTER...


Linked up to
Flamingo Toes


Tuesday, February 14, 2012

Playroom Chalkboard & Numbered Hooks

As if I haven't mentioned it enough already, I love love love Pottery Barn, but not so much their prices. Yikes! While browsing through their playroom ideas, I fell in love with the little chalk boards placed on the walls and noticed they had pails hanging on the side for chalk, crayons, what not... I'm sure ours will be filled with loose toys or who knows what once the baby is up and moving. Here's the picture I fell in love with.


Of course I could have just purchased these from Pottery Barn, but why would I go and do that : ). So... another project was started.

I was determined to find these little pails and after looking at Hobby Lobby and ACMoore, I finally found them at JoAnn Fabrics, I think for maybe $2 each, if that. I intended on doing just number hooks, but while at Michaels one day, I was browsing through their dollar section and came across these perfect little wooden hooks for $1.00.


Of course I didn't just leave them like that. I whipped out the paint, mod podge and Cricut. I painted each block black. Cut numbers out with my Cricut machine and mod podged them onto the blocks.


This project really took me no longer than an hour. The paint dried quickly and the Cricut cut the numbers out in less than 1 minute. I just let them sit out overnight and that allowed the modge podge to completely dry. I couldn't be banging into the walls with nails at 10pm anyway, otherwise we'd be up with a baby the entire night... you know the saying, "if you're the one to wake him up, you're watching him"... not this momma! : )
Here's the finished product.


Tuesday, March 22, 2011

Remodeled Dining Buffet

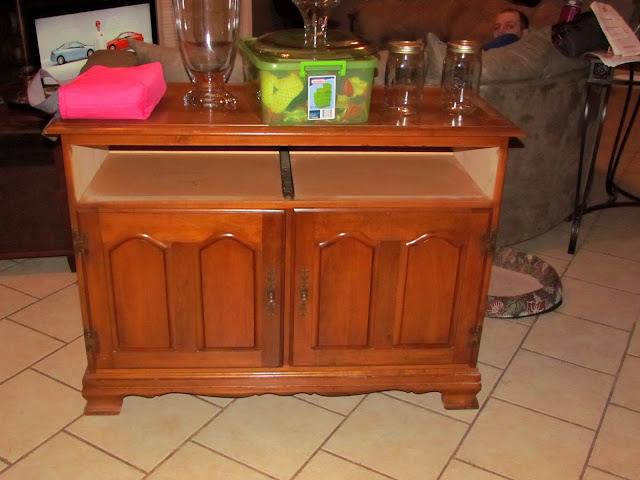
First of all, if my grandmother reads this, she will absolutely hang me. She had given me this old dining buffet with a hutch which is beautiful. However,  it just needed to be updated just a smigin to this era. That's a proper form of measurement right?

We don't currently have a dining room table, but within the next few years, I'll find a way to convince hubby that it's not just a waste of space.

So this is what I started out with...

I recently unloaded the car so it's quite a mess. Note to self - Clean the house.
Since this piece of furniture was real wood and still in great condition, I decided to prime it up before painting. I took drawers, doors and screws out and patched all the holes. I think primed every part that I was going to paint.

After making a few modifications and about 2 coats of black paint, this is what it turned out to be. I'm very happy with it. Now I'm working on making baskets of some sort to put on the shelves. They're just dying for some attention.

{After}

{Before}


I think it looks great and will work just as well with a dining room set when we decide to get one. 

Just to follow up; here are a few painting furniture tips...
1. Before painting, sand down the furniture. This allows for the paint to adhere better and gives a fresh surface.
2. Priming before you paint can be pretty important. If you don't, the paint will not stick and will just peel right off especially with laminate. I suggest having your primer tinted if working with dark colors.
3. Make sure you put enough coats on and get in the little crevices. I use a roller and then a regular paint brush to get into the small spots.
4. Let it dry! : ) I know I have a problem with this and when I let my excitement get the best of me, I later pay for it and have to remove paint from something or repaint a certain area.

Sunday, March 20, 2011

Jute Decor Spheres

This is one of my favorite Pottery Barn/Pier 1 knock offs. I got an apothecary jar at the new Kroger Marketplace near our home... just $14.00!! I of course couldn't resist. So then of course I needed something to fill it with. Instead of spending $5.00 a ball at one of my faaaaaavorite stores I decided I'd buy a pack of of 6 styrofoam balls at Walmart for about $3.00 and cover them with my jute string I already had.


Don't mind the mess in the background : ). It was midterm week and not much got done.


In order to get this to stay, I just used a hot glue gun. I just started the string in the middle and started wrapping it around until I got to the other end. I think they came out great.


 I LOOOOOOOVE IT!

Tuesday, March 8, 2011

Bathroom Shelving

I came across an old unfinished shelf I had from the old house and was trying to think of a way to use it. I knew I needed a "hook" system of some sort in the bathroom for towels, robes, clothes... you know, all that stuff that gets hung over the shower rod or ends up on the floor : ). Since it was free, I figured it would be a perfect opportunity to test my staining skills - I might have to eat those words later. So I pulled out some walnut stain I had left over from something else and went to town.


You'll probably notice my hardwood floors in the background : )... that would be a lack of judgment caused by my impatience and the fact it was raining outside and 40 degrees. *Note to hubby: we need a heated garage* I made sure that the area I was working with was completely covered though.

I got it stained and let it dry. Hung it up on the wall and added 2 hooks below for towels and what not. The hooks were purchased at Walmart in a bronze finish for about $2 each.

{Before}
 
{After}

Much better I think and I have somewhere to put our stuff. Now I just need my cricut machine I've "requested" for my birthday. : )

I'm in the middle of redoing the master bathroom so I'll add full pictures soon.

Sunday, March 6, 2011

Corkboard Cabinet Door

Not sure about you guys, but loose papers like take out menus, coupons, phone numbers, intructions (Anything!!) hanging out on my fridge drives me nuts : ). And you always get those heavy pieces that regardless what magnet or how many of them you use, it still slides to the bottom. Am I right? So of course, my wheels started turning with ideas. Ironically while I was at work one day cleaning out a spare office, I came across a spare corkboard so I thought, hmm I'll just take it home and cut it out.... Didn't work.... Why? : ) because it didn't dawn on me that it might be glued... duh Ashley.

Lesson learned. So I made a trip to walmart and they have a pack of 4 12x12 corkboard pieces that didn't cost much.


I laid out the pieces how they'd be placed inside the cabinet door and marked where they needed to be cut.


I got all of my pieces put together and put some glue on the back. The set comes with square foam sticky pads to go on the back, but they've never worked for me and I have no intention of taking this down for a long time. So I used tacky glue and then a little gorilla clue.


I finally got all the pieces up and let it dry.


: ) I'm sure it'll be cluttered in no time.